
Presently sponsored by: MEGA – The world’s largest provider of zero-knowledge E2EE cloud storage plus chat. Join 200m others who enjoy privacy – try MEGA for free.
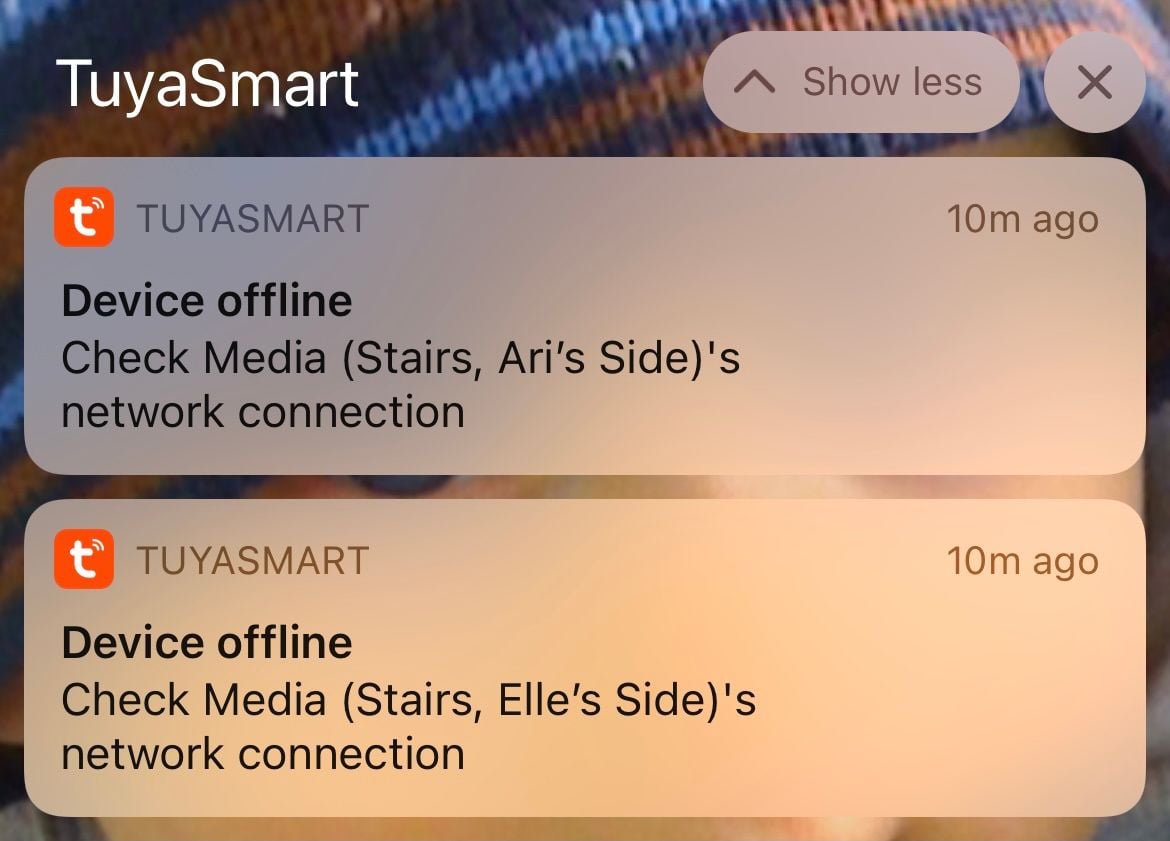
As I progressively make my house smarter and smarter, I find I keep butting against the intersection of where smart stuff meets dumb stuff. Take light globes, for example, the simplest circuit you can imagine. Pass a current through it, light goes on. Kill the current, light goes off. We worked that out back in the 19th century and everything was fine… until now. Here’s what I kept seeing with my “smart” light bulbs:
So, why is this happening? Why do my smart lights keep going offline? This tweet from Adam Fowler that I embedded in the IoT blog series linked above perfectly explains the problem:
I was looking at doing exactly this with my downlights, but the idea of the wall switch annoyed me – if it's off, I can't then voice turn on the lights. How are you getting around it, or just banning anyone from touching physical switches? 🙂
— Adam Fowler (@AdamFowler_IT) August 13, 2020
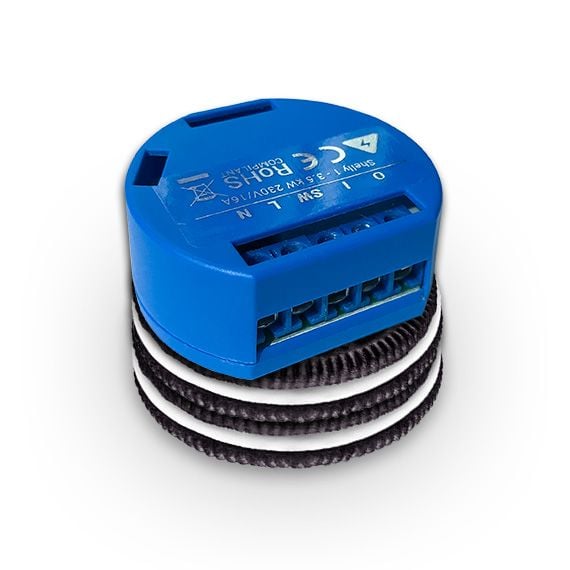
You see, smart lights require power in order to be, well, “smart”. When you flick a dumb wall switch, it simply kills power to the circuit which subsequently drops smart lights off the network. This is what was happening with the Tuya lights in the image above, plus they’d also drop off other platforms such as HomeKit on my iPhone and my Ubiquiti network map. The solution is to make the dumb switch smart by using a Shelly 1 relay:
I’ve written about these in my IoT unravelled series and how I was using them to toggle dumb switches digitally. In that post, I also played around with using Home Assistant to identify when the power had been killed and to issue an audible alert about not touching the switch:
I’m still toying which the right UX for connected lights controlled by a physical switch. In the kids’ rooms, I’m giving this a go: pic.twitter.com/cBLulGk5HE
— Troy Hunt (@troyhunt) October 19, 2020
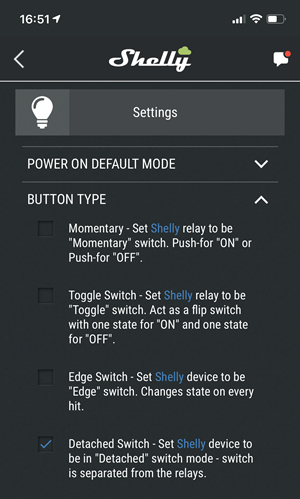
But that UX sucks and as I said in the post, a better option is the configure the Shelly as a “detached switch” which is what I want to dive into here, starting with the setting in the Shelly itself:
When configured in this fashion, the switch no longer opens and closes the circuit, rather it keeps it in the same state. So how do you grab the click event from there? I’m using the native Shelly integration and by default, here’s what the device surfaces once added to HA:
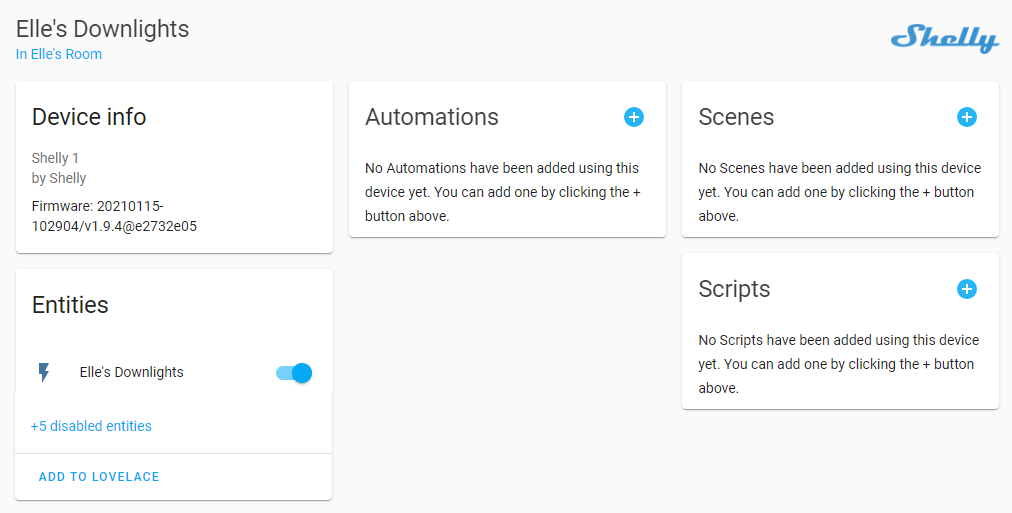
There’s only one entity exposed here which is the switch to turn Elle’s lights on or off. But there are also 5 disabled entities so let’s expand those and take a look:
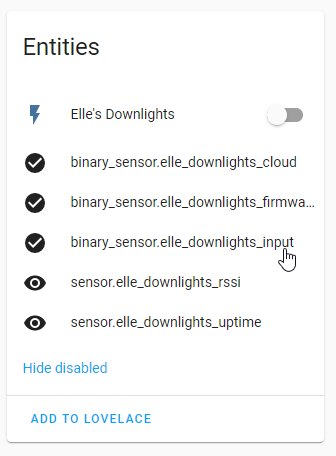
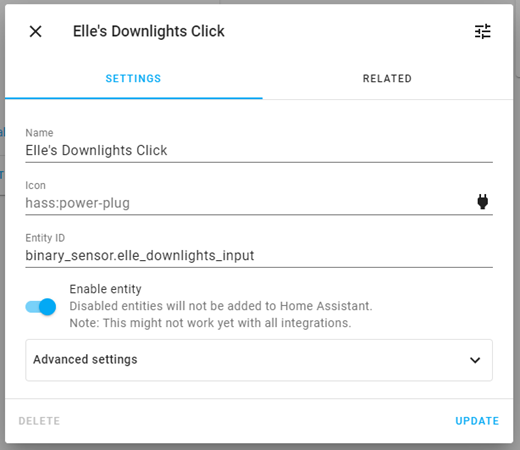
One of these is a binary sensor that has the device name followed by “_input”. Let’s click on that and name it “Elle’s Downlight Click” and enable the entity:
Now we just need an automation that’s triggered when the click occurs. I already have two scenes in Elle’s room: one to turn the lights on and one to turn them off so all I need to do is decide which one I need to enable. Here’s the complete automation:
- id: elle_shelly_click alias: Elle's lightswitch is clicked trigger: - platform: state entity_id: binary_sensor.elle_downlights_input action: - choose: - conditions: - condition: template value_template: "{{ is_state('light.elle_corner_door', 'on') }}" sequence: - scene: scene.elle_off default: - scene: scene.elle_onThere’s actually a whole bunch of different lights and switches in her room that are toggled by both those scenes. The value template is used to work out what we’re doing here; are we turning the room on or off? If the downlight immediately above her door is on then let’s turn the whole room off and vice versa. And that’s it – problem solved!
Ultimately, all I’ve really done here is made a light switch behave precisely as normal people as used to them working. And that’s great – I devoted an entire post to my IoT series on usability because it’s just so important that a house behaves precisely as people would expect it to. Tomorrow, I have the sparky here putting in a couple of dozen more Shellys so I can extend this behaviour across more rooms, including the one that caused those earlier Tuya alerts (sparky = electrician and you legally need one in Australia if you’re doing anything electrical beyond changing a lightbulb). Getting to a state of clean, seamless home automation is non-trivial, but I love the results!
One last thing as I’ve been getting this question a bit: what happens if I ever sell the house? Will it be unusable by anyone who hasn’t come to terms with the idiosyncrasies of DIY home automation? I’ve been giving it some thought, and the path of least resistance is that I’d simply set all the Shellys back to be edge switches. Leave them in the walls, leave the connected lights in the ceiling and set them back to default colours (i.e. a normal white light) and that’s it – job done. I’d lose the Shellys, but they’re cheap enough to probably be very close to the cost of the sparky’s time to remove them anyway. It’d take a few hours then the house would be back to a normal state. If ever anyone later pops a switch off the wall, they’d probably be left scratching their head, but it wouldn’t be my problem by then 🙂